Tutorial: Restick Cutting Mats

My Silhouette Cameo is a complete life saver and I use it for nearly everything. Using it so often means by cutting mats quickly lose stickiness. At €15 a go, they aren’t cheap to replace either and they’re hard to come by in Ireland. As such I’ve started resticking my mats myself and thought I’d share my technique with the rest of you!

Before you restick your mats, I have heard that doing this will void your Silhouette warranty so think twice if your machine is still covered by warranty.

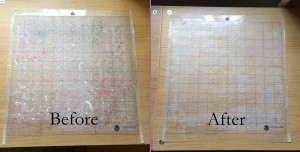
You can see below that before cleaning there were bits of paper and vinyl stuck to the mat and afterwards it’s nice and shiny!

Mat

Supplies

  • Something to remove the stickiness from the mat. A lot of blogs recommend GooGone but this isn’t available in Ireland so I used Sticky Stuff Remover.
  • A butter knife.
  • A scrubbing brush and nail brush.
  • Washing up liquid
  • Masking tape.
  • Repositionable Spray. I use 3M’s Repositionable Spray.

Instructions

  • Spray your sticky stuff remover over the entire mat. Let it sit for 5 to 7 minutes.
  • Put your mat down on a flat surface that can get wet. I put mine on a chopping board on top of the draining board.
  • Using the edge of a butter knife, scrape away any excess glue from one end of the map to the other. You’ll see a difference immediately:

IMG_0662

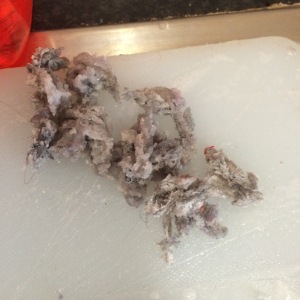
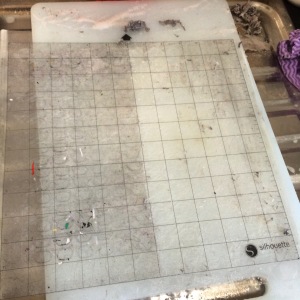
Here’s all the glue and other dirt that came off that mat:

IMG_0661

  • Once you’re scrapped off any glue, use a wet scrubbing brush and washing up liquid to scrub the mat. I suggest scrubbing in straight lines to stop glue getting stuck on other areas of the mat.
  • Rinse the mat in clean water and check for any remaining glue spots – they’ll appear white or cloudy. Scrub these spots with more washing up liquid I use a nail brush at this point because it tends to be a smaller area.
  • Pat off the mat with a clean towel and leave it to dry.
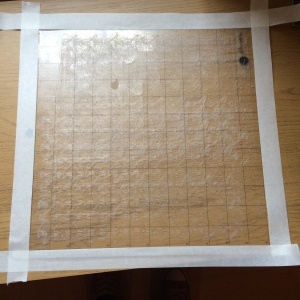
  • Once dry, cover the edges of the mat in masking tape like in the picture below, This keeps the edges clean and won’t gunk up your Silhouette:

IMG_0663

  • In a well ventilated room, spray a couple of layers of the repositionable spray over the mat. I usually spray enough until the mat looks off white or cloudy. I wouldn’t recommend doing this in your house if at all possible.
  • Put the mat to one side and leave it for 30 minutes to dry. Try and leave it somewhere where it won’t get dusty.
  • After 30 minutes check the stickiness of the mat. You’ll know from using the mats before whether it’s sticky enough. If it’s not sticky enough, spray some more glue over the mat. If it’s too sticky, pat the mat with a clean tshirt as you would with a new Silhouette.
  • Once you’re happy with the stickiness, cover the mat with the protective layer and use it as normal!

Hopefully this will help your mats last a bit longer and save you a bit of money too!

Craft Fair Tips

Deciding to do a craft fair can be a very daunting idea. I know when I first started doing craft fairs I didn’t know where to start. I made a lot of mistakes but I also learned a lot of valuable lessons so I’ve shared some of my tips below.

1. Craft Fairs and Car Boot Sales are not the same thing

This is a mistake I’m still making! This might not apply to everyone but I find I never do well at car boot sales. People usually use car boot sales to get rid of stuff they have lying around the house and this means shoppers are looking for bargains, not lovely handcrafted items. My general rule now is that if a fair mentions car boot sale at all I won’t take part. If you’re thinking of taking part make sure you ask the organisers what other people are selling. If there aren’t a lot of people selling homemade items you might want to reconsider. If you do decide to go ahead, ask the organisers to give you a stall near other crafters.

2. Invest in the right equipment

It can be expensive to get everything you might need for a craft fair but there are three things I highly recommend investing in; a wallpaper table, plastic storage boxes and a pop-up gazebo. The gazebo is going to be the most expensive thing but if you’re thinking of doing an outdoor show it’s an absolute must. If you do by a gazebo make sure it has sides and practice putting it up and taking it down on your own.

Wallpaper tables are inexpensive (€19 in Woodies) and I don’t know what I’d do without mine. It folds flat and is extremely lightweight making it the perfect stand for fairs. Sometimes fairs won’t provide a table or the table they give you is too small so having a backup will save you a lot of stress. Finally are the plastic storage boxes, preferably ones that stack on top of each other. When I first started doing fairs I lumped my stock into whatever box I could find. Plastic storage boxes keep everything secure, are easily portable and keep everything neat and tidy when I’m at home.

3. Practice, practice, practice

Before you go to any craft fair you should set up your stall at home. Take your time to tweak it and make sure everything is displayed right. If you have the space to leave it up over night, do. This will give you a chance to look at it with fresh eyes. Once you’re 100% happy with it, take a photo on your phone so you can remember how to set it up at the actual fair. If you’re looking for stall ideas, Pinterest has a wealth of information but I often find that the simplest idea is best. Add some empty boxes for height and dimension. Cover everything with a bed sheet so it looks neat and tidy. Root around your house and see what can be re-purposed to use as a display.

4. Get to know your fellow sellers

On the day of the craft fair introduce yourself to your fellow sellers, even if they’re selling similar items to yours. There is a lot more to be gained from chatting with other crafters compared to ignoring them. They’re usually the first people to buy something, they’ll be full of tips and tricks and they’re also likely to have information on other upcoming fairs. Craft fairs can also be very long days and it’s nice to have someone to talk to. If you’re on your own (like I usually am) it’s handy to have someone nearby who can keep an eye on your stall if you need to run to the loo!

5. Sell!

This one is obvious right? You’d be surprised. People shop differently at craft fairs and too many people make the mistake of thinking that their items are on display so they’re going to sell out. It’s not that simple. My personal rules for craft fairs are as follows:

  • I engage everyone who approaches my stall, either by saying hello or just smiling. If they’re looking at a particular item I’ll encourage them to pick it and to ask questions. I read body language too. You can tell if someone just wants to take a look – they usually stand a few steps back from the stall. I just say hello to these people and this usually brings them closer.
  • I never sit, read a book or play on my phone. This makes you look disinterested and unapproachable. If I want to keep busy I’ll bring along some crafts that I can do on the spot. This usually encourages some questions too!
  • I make sure everything is clearly priced. Handmade items can be expensive. If there’s no price a customer may be interested in an item but afraid to ask the price in case it’s through the roof. Some sellers thing having no price will encourage a customer to ask questions, I find the opposite.

6. Don’t be afraid to say no

This applies to everything.

  • Have the organisers put you in an awful location? Tell them it’s not ok and ask to be moved. You’re usually paying them to have a stall at the fair so you’re entitled to ask for a better location, within reason! You won’t always get a prime spot, but last weekend I ended up in a spot which meant customers couldn’t have gotten to my stall so I asked to move. Similarly, if they’ve placed you beside someone selling the same type of items you can ask to move.
  • Does a customer want to take a photo of your items? If you think it’s so they can copy your idea, you can say no. If you have a website or sell on Etsy, offer them the website address instead.
  • Do you think someone is being too rough with your items? You can ask them not to. This especially applies to children who might not know better. Just explain nicely that the item is delicate and ask them to be careful. At the end of the day, if they damage the item from being too rough you won’t be able to sell it.
  • Is someone trying to drive a hard bargain? Everyone haggles but if the price they’re asking for is too low you can say no. Selling something at a loss is worse than not selling at all. You also don’t have to justify your prices. Customers who aren’t familiar with craft fairs might be expecting to pick up a bargain but unfortunately handmade items often cost more because of the time and effort involved.
  • Are you being asked detailed questions about the creation process? I find this the toughest of all. I don’t want to seem rude but, similarly to taking photos, I also don’t want people recreating my items. I usually give vague answers and if they ask for detailed instructions I ask them why they want to know (politely). This normally ends the questions. If they persist I explain that I don’t want people copying my ideas so I can’t give them any more information.

Each time you do a craft fair you’ll learn some new tip that will make things easier in future. Hopefully the tips above will help but if you have any questions or tips let me know in the comments!
Do you shop local?

When I opened my Etsy shop I was adamant that I was only going to buy my supplies in local shops. After all, they were just like me, except on a bigger scale with bigger bills to pay!

There are lots of benefits to shopping locally; you get the personal service from the staff, you can actually speak to someone about the pros and cons of a product and when you need something you can get it straight away.

There are also from drawbacks to only shopping locally as well. I’m only starting out so funds are tight and I can often get things a lot cheaper online than I can in a store. There’s also more choice online which gives me the option to do more.

Online isn’t a bed of roses either. Sometimes items can take a long time to arrive; I recently waited 2 months for some cake stand handles to arrive and when they did arrive, they weren’t as described. I’ve also been stung when I bought something online for a great price only to discover that I could have bought it cheaper in a local shop!

I eventually decided that it was easier to shop locally and online. If I need something immediately, or only need a couple of things (i.e., a couple of sheets of felt) I’ll buy it locally but bulk or expensive items I buy online. That said, I always look for an Irish online retailer first and always check the price in my local shop!

I’ve started looking in charity shops for stock too as you never know what could turn up there! I’ve had some good finds and it’s nice to know I’m shopping local and supporting charity as the same time.

What about you? Do you buy your supplies online, locally or a bit of both?

Rain rain, go away…

We’ve been having a pretty typical summer in Ireland so far. We’ve had the odd nice day but it’s been raining more often than not and the weather is so changeable! They aren’t lying when they say we get four seasons in one day here!

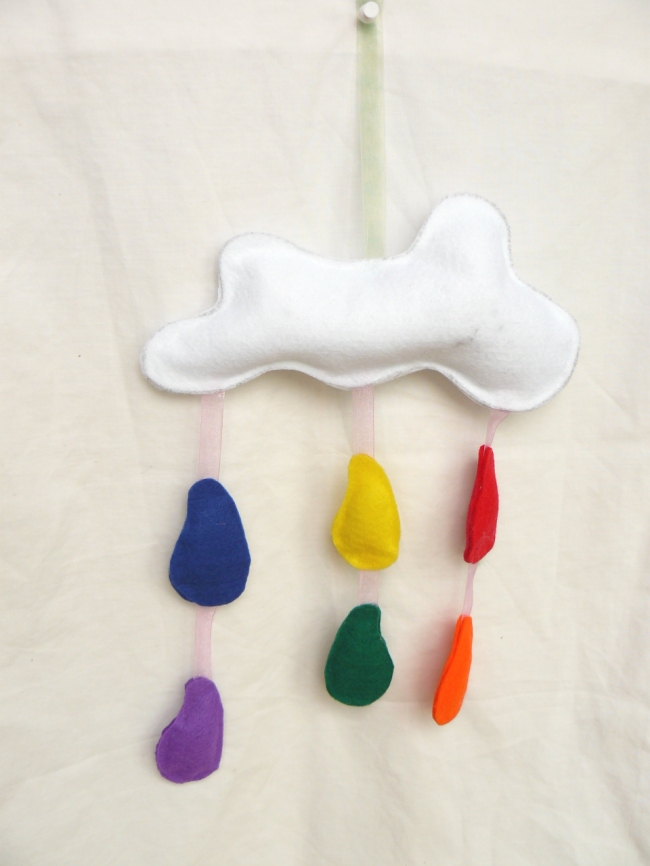
I decided to take inspiration from our weather for my latest project, a felt cloud mobile.

Image

I drew out a couple of different designs before I settled on the final version. The first design had a big fluffy white cloud with lots of curves, almost like a cartoon sheep! I thought this would take me too long to cut out and glue together so I simplified the shape of the cloud a bit more.

I also wanted to put a face on the cloud to make it more appealing to children. I had planned to hand sew the face but again, this was taking me too long so I went back to a plain, simple cloud design.

Next I got to work on the raindrops. These are a simple shape and the only challenge was working out the right size. I was going to connect the raindrops to the cloud with twine but this didn’t match the overall design as well so I used ribbon instead. I’m aiming this at children or babies so I went with blue and pink ribbon. I’m going to see if I can get some yellow ribbon for expectant parents who don’t know what they’re having! I’m also going to do a version with clear or white ribbon.

The mobiles take a bit of time to make but they’re so bright and summery that I really enjoy making them!

Click here to see the mobiles in more detail on Etsy.


Right Tools For The Job

The majority of the crafts I make involves cutting. Lots and lots of cutting. It’s really time consuming and it makes large projects very tedious.

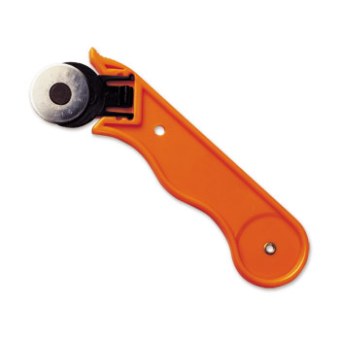
A couple of weeks ago I discovered rotary cutters and decided to invest in one. I bought a 29mm Jakar Rotary Cutter for about €6 on ebay but most art shops will have them too.

Image

A rotary cutter looks like a pizza cutter but the blade is extremely sharp. Trust me on that one! The blades can also be easily replaced. It can be used to cut paper, felt, fabric or leather and it saves so much time.

For instance, last night I wanted to build up my stock of felt flowers. Each flower consists of 5 individual petals which are cut individually. I needed nearly 70 flowers (eek!) and it normally takes me about 4 hours to get all the petals cut.

Last night it took an hour! One hour! I could probably have been quicker if I hadn’t been watching TV at the same. When cutting paper I can get through over 10 sheets of standard GSM paper in one go.

This rotary cutter is a lifesaver and I just wish I’d found it sooner!

Taking stock

Since I officially started selling on Etsy I haven’t really had a ‘system’. My mood and what supplies I had to hand were the main deciders when it comes to making stock for the shop. I never made something because I was running low on that particular thing.

Last Thursday I did a formal stock take and got a bit of a shock! I had over 100 of one type of paper flower and only 1 of another kind. I had completely run out of other things. With three craft fairs coming up before the end of the month I had to get my ass in gear!

To figure out how much stock I needed I worked out the minimum amount I would need for one craft fair. Then I doubled that number. This gave me the absolute minimum amount of stock I needed at one time, but I aim to have more than that ready. I figure that will always give me a cushion in case I have two fairs in quick succession and don’t get a chance to replenish stock.

I’ve also implemented a new rule. In addition to my last post where I said I wouldn’t put anything on Etsy until it was perfect, I’m also not going to list anything on Etsy until I have the minimum stock created! 

Patience

When I come up with a new craft idea I can’t wait to share it with everyone on Etsy. I rush to get it done, photographed and stocked in the shop.

About two days later I start to realise that I could have made the item a lot better if I’d spent more time on it. I then redo the item, take new photos, write a better description and finally I am happy with the piece. By rushing I’ve wasted my own time and my stock.

This is something I promised myself I would stop doing. From now on, I only stock items in my shop if I’m completely happy with it and one item spurred me on to do this.

My boyfriend and his friends are really in to vintage Volkswagen. I recently overheard them giving out about how hard it was to buy leis or garlands for their vans or cars. I figured I could make a lei easily enough so away I went.

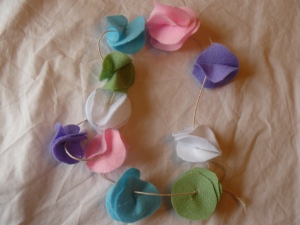
I cut three circles of felt and sliced a small hole in the middle.  I threaded twine through the hole and put a blob of hot glue near the thread. I then pinched the circles together over the glue to create a ‘petal’ affect. All in all it took about 20 minutes to make. The finished product is below.

P1110196


I thought it looked great but when I showed it to my boyfriend he didn’t share my enthusiasm. I was still adamant that it was good but his lack of interest stopped me putting it on Etsy.

I left it where I could see it for a couple of weeks and slowly realised that it was, well, crap. If I just spent a bit more time and effort on it I could make something much better.

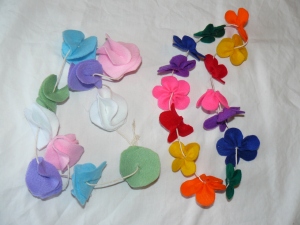
I went at it again. This time I used brighter colours for the flowers. Each flower is made up of 5 individual petals which are sewn together. Again, I threaded twine through the centre of the flower and put a small bit of glue under the flower to stop it slipping. This technique takes about an hour per lei but I am 100% happy with how it looks. I’ve put this one on Etsy and have already sold a couple to my friends!

You can see the side by side comparison in this picture.

P1110197


http://www.etsy.com/listing/127239799/hand-made-hawaiian-felt-lei-flower


Sometimes you might have a great idea that you can’t wait to show everyone but a poorly made item will do more damage than taking a few days to get it right.